Why is it that kids LOVE science so much? Is it because they like the idea of being scientists with lab coats and safety goggles? Is it because they want to conduct science experiments and make things explode? Is it because they are thrilled at the thought of discovering some groundbreaking new truth in their first grade investigation that no scientist has ever come across before? Or do they simply enjoy learning about our world in a hands-on, engaging way? Yes to all of the above! In the young mind, science is FUN and EXCITING.
But how many times do we squash the life out of that thrill by opening up a textbook and doing worksheets? Now there are times when textbooks and worksheets can be great supplemental activities, but you gotta admit, reading a textbook is a tad bit less exciting that making something explode. 🌋 💁 So how can we go beyond the book and get our kids engaged and active in science?
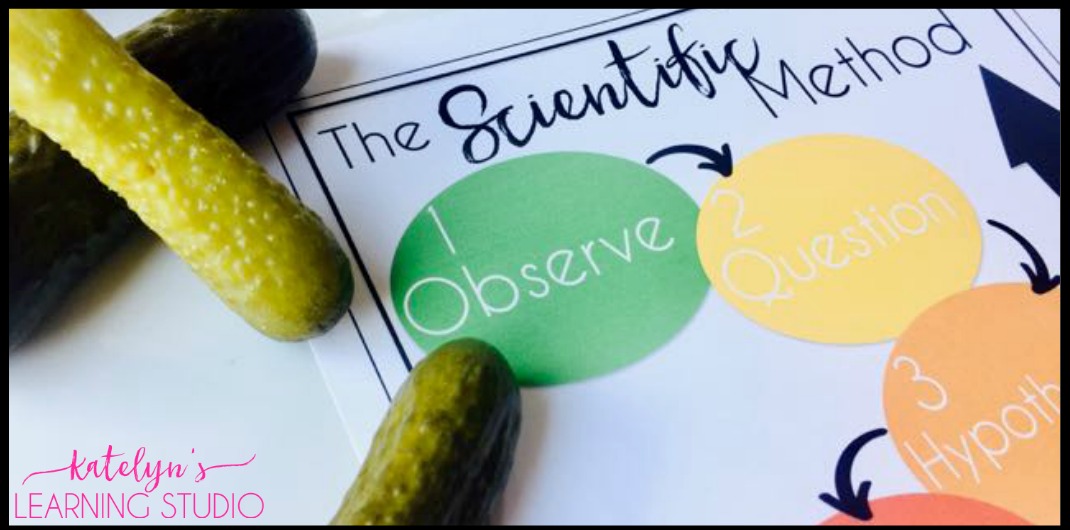
You can use the Scientific Method to get your students involved and engaged in any topic. I just wanted to teach my students the scientific method first, so I chose the topic of pickles to get them going. As you move through different units of study, you can choose more academic topics.
It’s a series of 6 steps (there are different versions, but we’ll use the above version for these lessons) that scientists use to learn more about the world. By scientist, we mean any one who wants to learn! So yes, definitely tell your kiddos that they are scientists, because they are!
Following is my unit to introduce the steps of the Scientific Method to Early Elementary learners. I wanted to share the lesson plan for the introduction, but the rest of the unit I’ll just give you a summary of what we did. If you want more specific lesson plans and the resources we used, you can CLICK HERE for the unit!
Optional Craftivity:
Hook:
When they all have their goggles on, I bring the students to the carpet and ask who has ever wanted to be a scientist before? Then I tell them that they will get the chance to do that today!
Tell:
It’s important to me to always state the objective at the beginning of each lesson, so I start off by explicitly telling them we are going to learn how to experiment like scientists do by learning the steps of the Scientific Method.
Show:
I explain that scientists can be anyone trying to learn more about the world and how it works. All scientists have 6 steps that they follow to help them experiment. It’s called “The Scientific Method”. Show the Scientific Method poster included in my unit, or write the 6 steps on the board.. Go over each step, explaining with an example what a scientist would do at each step.
1. Observe: A scientist notices that different colors of flowers grow in different spots in a field.
2. Question: She wonders if different soils make the flowers grow different colors.
3. Hypothesize: She thinks that if he adds extra fertilizer to a plant’s soil, it will grow a darker color.
4.Experiment: She grows three red flowers, each with different amounts of fertilizer.
5. Analyze: She records that all 3 flowers were the same color red, but the ones with more fertilizer grew taller.
6. Conclude: The amount of fertilizer doesn’t change the color, but the more fertilizer it gets the taller the plant grows.
Help:
Write “The Scientific Method” on the board and have 6 cut out circles or strips of paper with the names of each step on them. Have students help put them in order and as a class come up with an example for each one.
Monitor:
Have students see if they can tell their neighbor the six steps of the Scientific Method. Give each student 6 sticky notes. Have 6 posters hung throughout the room with the name of one of the steps at the top. Have students write or draw what each step means or would look like on a sticky note and stick it on that poster (or just let them write directly on the poster with markers).
And voila! You have a solid introduction to the scientific method!
Lesson 2: Observe
In this lesson we learned how to use our five senses to make quality observations. We practiced before hand as a class so that they would be able to make quality observations. I modeled with a cheerio, then we made observations as a class with raisins. For their assignment, I wanted something fun and interesting that would have very distinct characteristics, so I chose smelly, tangy, bumpy pickles! I just grabbed a Costco sized jar of the whole baby dill pickles and it was the perfect amount for each student to have one. I gave each student one pickle on a napkin, and a recording sheet that had a section for each of the five senses. Then it was exploratory time, and the students got to observe the pickles with their senses. They wrote down 2 or 3 words for each sense that described the pickle. We then came back as a class and filled out a large anchor chart of our observations together that we could hang up in the classroom.
Lesson 3: Question
The next day we reviewed the Scientific Method steps to see which step we were on. I modeled questions that I had about the universe, and explained how there are curious questions (what, why, who, when) and action questions (what would happen if, would it, how would it react, etc.). They are all great questions that scientists use, but in our class we could probably do more with the action questions. We made a T-chart on the board and brainstormed curious questions and action questions. Then we revisited our Pickle Observation Anchor Chart and talked about how interesting pickles were. I challenged them to come up with an action question we could use to guide our class investigation about pickles. I gave them each strips of paper they could write their question idea on and then sign their name on the back (so that you can monitor and assess). They then “submitted” their question to our investigation box. They could submit as many questions as they wanted!
Lesson 4: Hypothesize
After school I sorted through the submitted questions and chose the three most practical questions we could experiment on. As interesting as it would be to discover what would happen if we sent a pickle to space, it would be hardly practical to coordinate a pickle mission with NASA. *If practical questions are limited, feel free to “plant” a reasonable question or two! 😉 Just be sure to say you didn’t look at who wrote any of the questions if they ask. Share the top three questions you chose with the class and have them vote on which question they’d like to experiment on. My class chose the question,
“What would happen if you cooked pickles?”
It may have started out as “What would happen if you exploded a pickle,” but I though, hey, I can work with that! We chose two different ways to cook our pickles (microwave and fry in a frying pan) and wanted to see if it would change the pickle at all. So we chose our question, then it was time to hypothesize. I taught them that a hypothesis was a prediction or guess at what would happen in an experiment, and you had to use “If… then… ” words. We practiced making hypotheses based off of some example experiments I gave them, then they were ready to make a hypothesis about our pickle question. I had each student go back to their desks and write their own illustrated hypothesis about what they thought would happen when we both microwaved and fried the pickle.
Lesson 5: Experiment
It was finally experiment day! We had a great teachers lounge that had a kitchen, so I coordinated with my principal and other teachers and reserved the teachers lounge for the last 30 minutes of the day. We went over the importance of keeping track of data during our experiment and reviewed behavior expectations. Then we brought our data collection sheets and students sat at the tables working on drawing a before picture of their pickle while I cooked the pickles.* Let me tell you, this was a STINKY experiment. I had no idea how bad hot pickles smelled/tasted–but trust me, it was a lesson they will never forget! So worth it. When their gourmet dish was ready, I served one to each student, and they went through the 5 senses worksheet again with their “after” pickle.
*I microwaved a dish full of pickles for 2 minutes, stirred, then another 2 minutes. If yours don’t get hot enough, you can go longer for 1 minute intervals. Then I poured the rest of the pickles in a pan and sautéed them (oooh, don’t I sound fancy? 💁 ) for about 5 minutes.
Lesson 6: Analyze & Make Conclusions
The next day we talked about the importance of thinking about our data and making a conclusion. The experiment was fun, but it doesn’t really mean anything if we don’t learn something from it. I challenged them to make a goal to learn something new from every experiment they do. We reviewed our experiment data sheets and together drew conclusions that answered our question. Then we made a graph showing how many of our hypotheses were right and how many were wrong. The final assignment was an experiment summary where they write about whether their hypothesis was right or wrong and why, and write a conclusion based off of what they noticed in the experiment.
To wrap it all up, I have students compile all their papers from the unit into one fancy “Investigation File” that they can take home and show off to their family.
And that is how I taught the Scientific Method! Here is the link to the unit where you can purchase the lesson plans and materials. Enjoy those pickles! 😉
PS: Don’t forget to download my FREE Reading Intervention Cheat Sheet, which has TONS more phonics tips and activities for your struggling readers.

Use this guide to supplement your reading intervention programs and help your struggling readers.


