Word Mapping Activities for Mapping Graphemes to Phonemes
Word mapping activities are the best way to get new sight words to stick in the brain! Word mapping uses the Science of Reading to help students with mapping graphemes to phonemes and turning new words into instantly recognizable sight words. It is one of the most valuable reading intervention tools you can use. It is powerful!
Word mapping strategies to help students map graphemes to phonemes and learn words.
Word mapping helps students learn words faster. The more words they can map, the better they read.
That’s because word mapping (or orthographic mapping) is the way the brain turns new words into instantly recognizable sight words.
This is how we get students to read more fluently and effortlessly!
IN ADDITION to explicitly learning new words faster, word mapping activities also give students the skills and tools they need to map words on their own while they read!
That is the goal–
that students will be so good at word mapping that they can build up their bank of “sight words” (automatic and instantly recognizable words) while they are reading.
BUT, struggling readers often can’t get to that point by themselves (I have another post explaining why coming soon!)
Hence the need for word mapping activities to explicitly practice word mapping AND build phonemic awareness skills and phonics skills to make mapping words easier.
I have 11 easy word mapping activities to share with you to help your students memorize sight words more quickly and less painfully!
🎬 Word Mapping Activities Video:
Here is a video showing all 11 word mapping activities in action.
✨For more detailed instructions PLUS activity variations and adaptations, be sure to scroll down and keep reading! 👇
FREE Reading Intervention Cheat Sheet
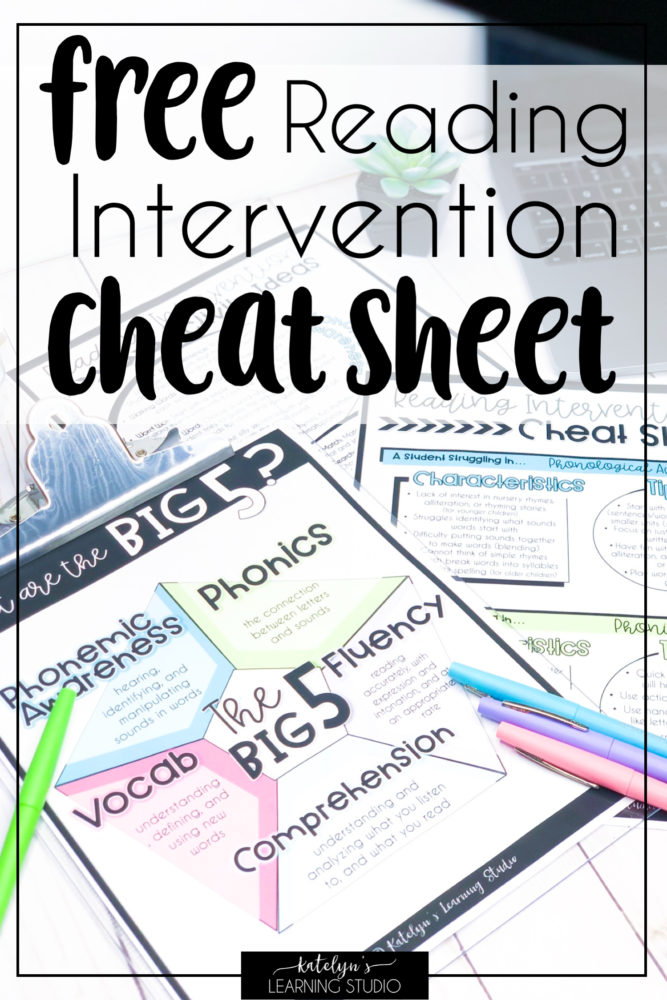
These reading intervention tips and ideas will help your struggling readers!
If you are needing some direction on how to pinpoint learning gaps and then how to address those specific gaps for your struggling readers, download my FREE reading intervention cheat sheet! It gives characteristics of struggling readers for each skill, and then activity ideas and tips for each type of struggling reader.
These word mapping activities for kids use the science of reading to learn words in the most effective (& fun!) way.
What is word mapping?
So, what is word mapping, exactly? Word mapping is the act of mapping graphemes to phonemes, or matching written letters to the sound you hear in words.
- graphemes = LETTERS that make-up written words
- phonemes = individual SOUNDS that make-up spoken words
- Connecting graphemes to phonemes = reading words!
It’s the process of breaking a word down into its individual sounds, or phonemes, and then mapping those sounds onto letters.
I’ll explain more about HOW to implement it in your instruction below!
Word Mapping Example:
Let’s say you’re trying to read the word “cat.” You would:
- First identify the three sounds in the word: /k/ /a/ /t/
- Then, you would map those sounds onto the letters c, a, and t, respectively
This word mapping tool is a great resource to show how any word is broken up into sounds.
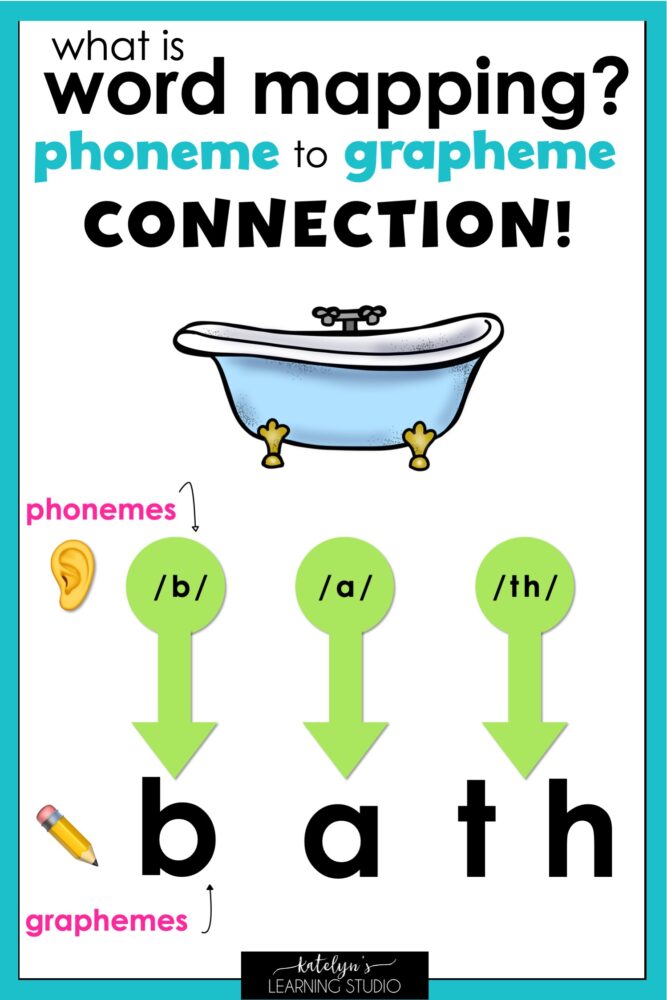
Connecting phonemes to graphemes is how students learn words through word mapping.
Why are word mapping activities so effective?
- For one thing, they help students focus on the individual sounds in words, rather than just guessing based on the first letter or two.
- They also help build phonemic awareness, which is the ability to hear and identify individual sounds in words. This is a crucial skill for reading as it lays the foundation for phonics instruction later on.
- Last, word mapping is literally how students turn new, unfamiliar words into instantly recognizable sight words in a process called orthographic mapping.
Here are some effective word mapping worksheets that facilitate orthographic mapping using fun and systematic activities!
THIS is why struggling readers struggle.
Learning to read words by drilling flashcards and memorizing sight words can sometimes feel like you’re beating your head against a wall and getting nowhere. So much time can be spent reading the same sight word lists over and over again, but then you put those words into text and they seem completely foreign to your students–even after so much drilling and practicing!
Sound familiar?
Here’s the problem:
Struggling readers can require up to 60 (or more!) exposures to a word to memorize it–compared to just 4 exposures for typically developing students. That is a LOT of flashcard drills for just one word.
Memorizing words simply isn’t efficient enough to catch struggling readers up to their peers.
What struggling readers need is to be better at orthographic mapping.
*This is the Comprehensive Reading Assessment I use to pinpoint my struggling readers and the skills they need intervention in.*
**And here is more information on Using the Science of Reading to Overcome Reading Difficulties).**
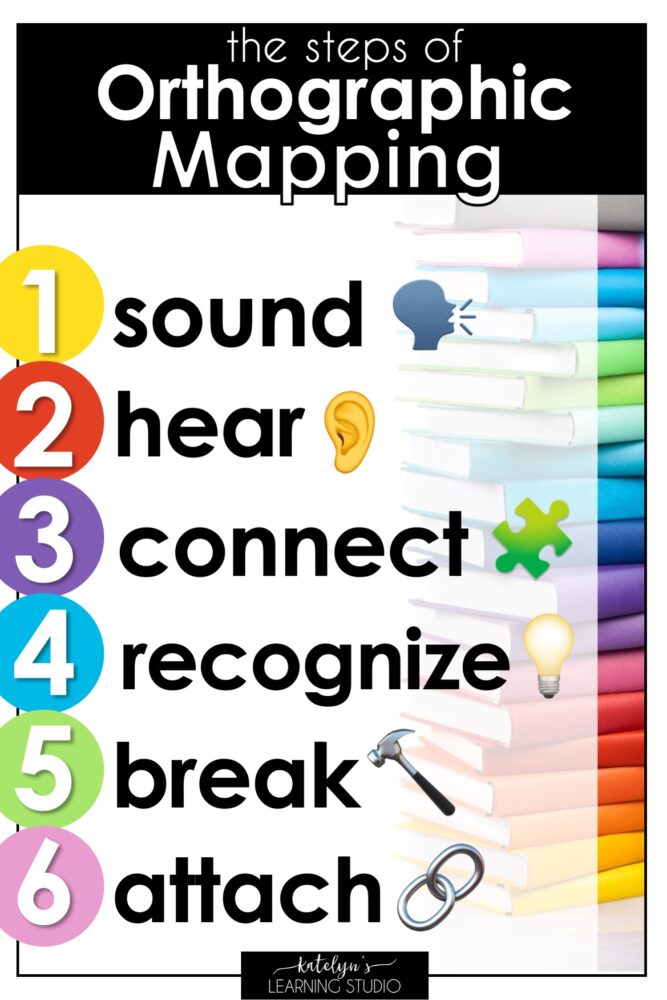
What is orthographic mapping? These are the steps the brain uses to form new sight words!
Background Info: What is Orthographic Mapping?
Orthographic mapping is your brain’s way of turning unfamiliar words into automatic sight words that you can read without even thinking about it.
Here’s the basic orthographic mapping process:
- Students see a new, unfamiliar word.
- They decode (sound out) the word out loud.
- They hear each sound in the word as they sound it out.
- Their brain takes the sounds and puts them together.
- Their brain then has a light bulb moment and recognizes the word.
- This time, their brain then REVERSES the process and breaks the word back up into sounds.
- It then takes each individual sound and “connects” it to the letters on the paper that make up that sound.
**Here’s an entire blog post explaining orthographic mapping in depth.
☝️ THAT process is how students map words permanently in their brains. THAT is how new words are learned.
Now, for some students, that process is very natural and intuitive.
For other students (especially those that have a phonological core deficit), that process does not happen naturally.
So, activities that PRACTICE word mapping really help facilitate natural orthographic mapping too.
Now let’s talk about specific word mapping activities that build those orthographic mapping skills!
How can you use word mapping activities in the classroom?
There are TONS of easy ways to implement word mapping into your everyday reading instruction.
The following word mapping activities give these ✨benefits✨:
- they build phonemic awareness
- they solidify phonics and decoding skills
- they help map graphemes to phonemes
For all of these activities, the aim is to match the phonemes (sounds) to graphemes (letters).
All you are doing is:
- Identifying the sounds in words (here are some phonemic awareness intervention strategies for more phoneme activities you can do)
- Seeing how those sounds match up with letters
Now, let’s get to those word mapping activities!
There are SO many fun variations for these word mapping activities!
For multi-sensory learning, I always suggest using some sort of 1.) tactile strategy for counting phonemes (Phoneme Focus), and then some sort of 2.) visual for the letters that match (Grapheme Connection).
(Here’s another epic blog post with loads of multi-sensory reading intervention activities!)
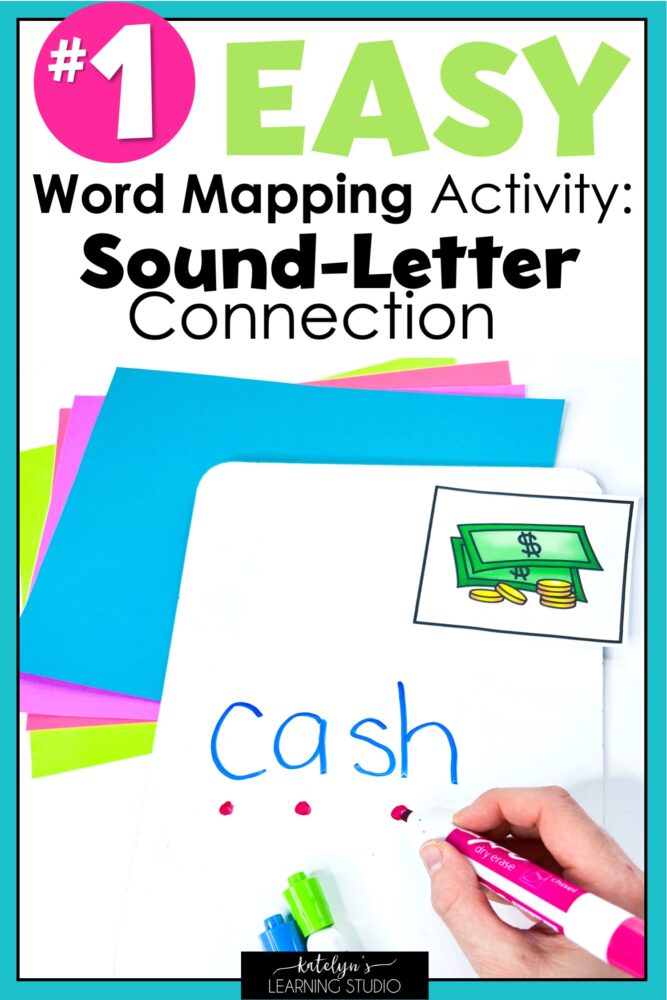
What is word mapping? This activity gives an easy way of connecting sounds (phonemes) to letters (graphemes).
Word Mapping Activity #1: Sound-Letter Connection
This first activity is creating an awareness of the sound-letter connection. When we connect each grapheme to phoneme, it helps give a “shelf” for students to hang phonics patterns on and remember the word.
This activity is great for pre-readers and younger students. They might not be able to read yet, but it gets them thinking about how the sounds in words connect to the letters that represent them.
For tips on how to teach phonics patterns in systematic steps, this blog post has everything you need!
1. Phoneme Focus:
- Say a word.
- Together, say and count each sound on your fingers.
2. Grapheme Connection:
- The teacher shows or writes the word on the board.
- Say the sounds out loud again as the teacher draws a dot under the letter(s) that make each sound as you say it.
- Talk about how the sounds match up to the letters.
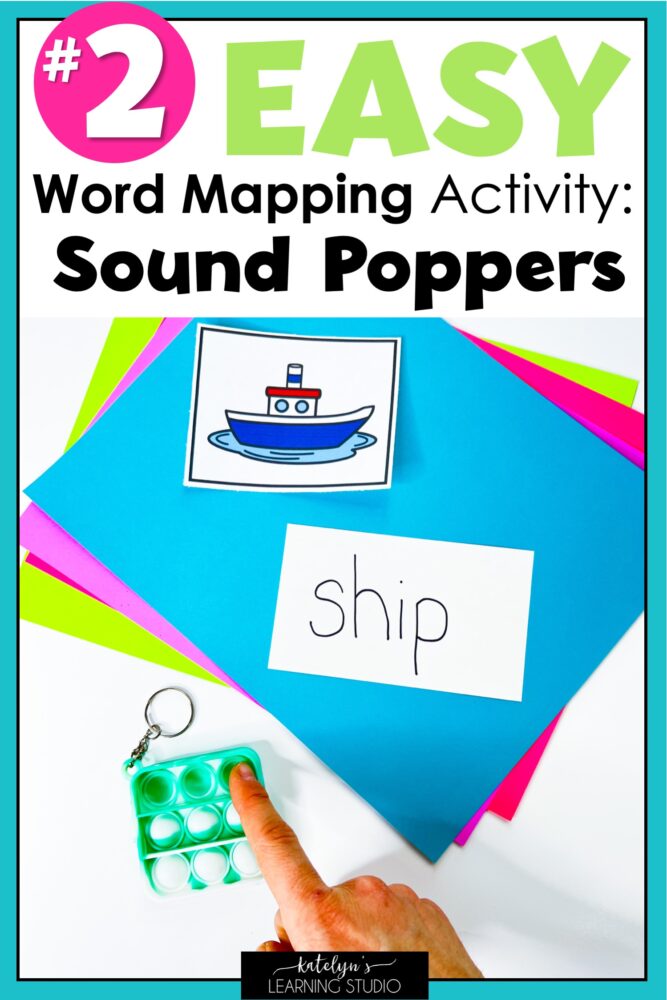
You can use a word mapping tool like these mini-poppers to match the phonemes to graphemes.
Word Mapping Activity #2: Poppers
Poppers are a super fun way to add engagement AND a tactile element to phonemic awareness practice! Seeing each bubble popped also gives a good visual for each sound, and gives them something tangible to represent the sounds so they can connect them to letters.
1. Phoneme Focus:
- Say a word.
- Have students say each sound in the word out loud.
- Then say each sound again and “pop” a bubble in the popper as they say it.
- Count how many bubbles are popped to see how many sounds are in the word.
2. Grapheme Connection:
- Show the written word.
- Have students touch the first “popped” bubble and say the sound, then say the letters in the word that make that sound.
- Have them repeat for each sound in the word.
Variations and Adaptations:
- If students don’t know how to separate the letters into sounds, you can separate the written word into sounds by drawing lines in between each “sound” in the word for them.
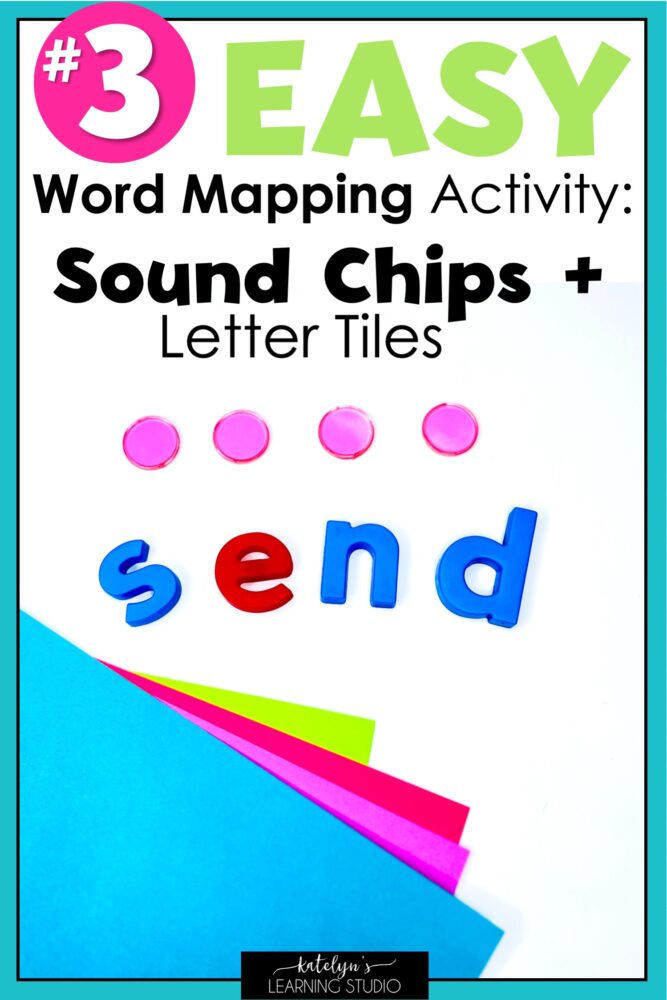
Use letter tiles and bingo chips to show phonemes, graphemes, and the connection between them.
Word Mapping Activity #3: Sound Chips & Letter Tiles
This is a basic but EFFECTIVE activity. It’s super easy to pull together and the letter tiles make it accessible to all levels (plus add a fun hands-on element!).
1. Phoneme Focus:
- Say a word.
- Have students segment the word (break it into sounds) by saying each sound out loud.
- Then say each sound out loud again, but this time for each sound, put down a bingo chip in a line.
- Count the bingo chips to see how many sounds are in the word.
2. Grapheme Connection:
- Say each sound again, but lay letter tiles under each bingo chip that make that sound in the word.
- Then have them point to each bingo chip one more time are read the letters that go with each sound chip.
Variations and Adaptations:
- If students already know the letters and sounds used in the word, they can lay out the letter tiles themselves (having the tiles they’ll need already in a pile makes it go more smoothly).
- You can have the word already written for students to refer to as they spell it out.
- If the student doesn’t know the phonics patterns in the word yet, you can lay the letter tiles out to the side, separated into sounds already. Then the student can take one “group” of letters at a time and match them to each “sound chip” as they say the sound.
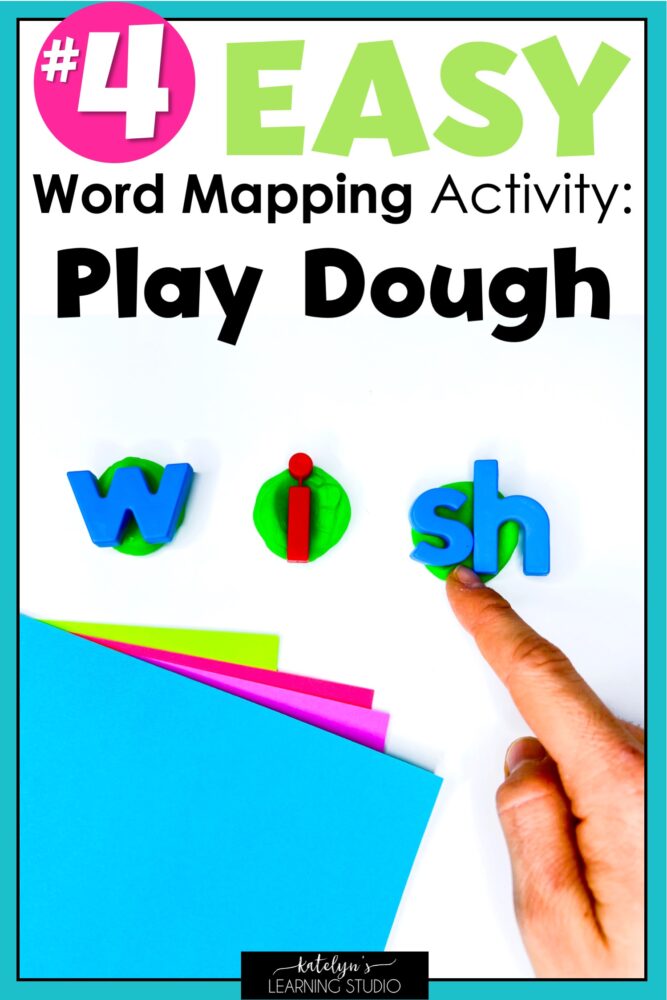
Play-dough makes a fun word mapping activity when you use letter tiles with it!
Word Mapping Activity #4: Play-Dough
This one is definitely a student favorite!! Again, the tactile play-dough smushing for the sounds is so engaging. Sticking the letter tiles directly INTO the play-dough also is a great demonstration of how the phonemes connect to the graphemes!
1. Phoneme Focus:
- Say a word.
- Have students say each sound out loud and set out a small play-dough ball for each sound as they say it (it is helpful for the teacher to have some pre-rolled balls set out).
- Count the playdough balls to see how many sounds there are.
- Say each sound again, but smush the ball with your finger as you say each sound this time.
2. Grapheme Connection:
- Have letter tiles laid out to spell the word.
- Have students take the letter(s) that go with each sound and “smush” them into each clump of playdough.
- Then have them point to each clump again and read each sound, this time with the letters smushed into them.
Variations and Adaptations:
- You can have the letters “pre-grouped” into sounds to make it easier.
Here is another fun way to use Play-Dough to teach phonics!
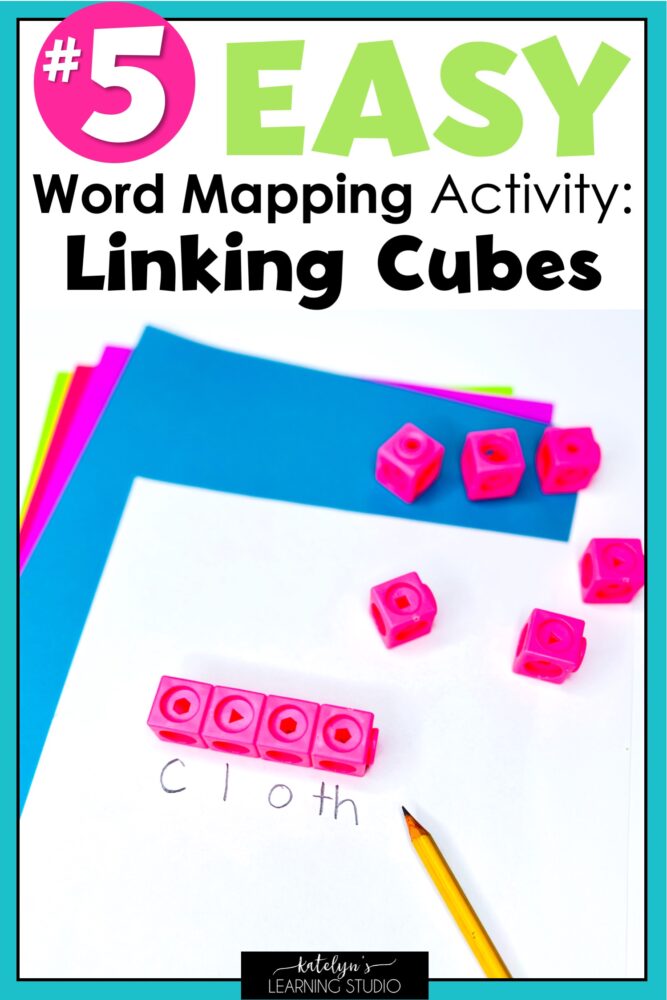
Using manipulatives like these linking cubes makes phonemes counting more tangible and interactive.
Word Mapping Activity #5: Linking Cubes
This activity is a fun way to show how separate, distinct sounds come together to make one whole word. Adding the grapheme writing at the end helps students map graphemes to phonemes.
1. Phoneme Focus:
- Say a word.
- Have students break the word into sounds out loud.
- Lay out a linking cube for each sound.
- Connect all of the cubes and say the whole word.
- Count the cubes to see how many sounds are in the word.
2. Grapheme Connection:
- Place the cube train on a piece of paper.
- Under each cube, have students write the letter(s) that make that sound.
- Point to each group of letters and say the sounds again.
- Then read the whole word!
Variations and Adaptations:
- If students don’t know the phonics patterns or don’t have the fine motor skills to write the letters to fit with the cubes, the teacher can write the letters for them, and the student can trace them.
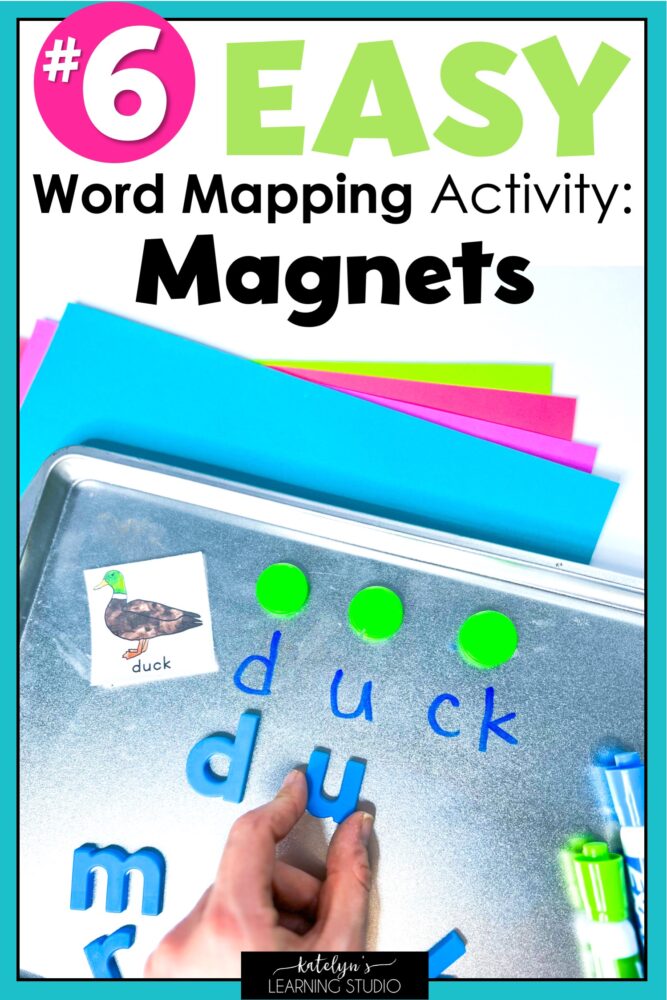
Mapping graphemes to phonemes works best when activities are hands-on and engaging, like this magnet activity!
Word Mapping Activity #6: Magnets
Cookie sheets are so versatile to use with all sorts of accessories! My favorites are round magnets to represent sounds, magnetic letter tiles, and dry-erase markers that are super easy to wipe off.
1. Phoneme Focus:
- Say a word.
- Say each sound out loud.
- Put a magnet on a metal cookie sheet for each sound as you say them again (you can also have the magnets lined up on the bottom and they can slide a magnet up for each sound).
- Count the magnets to find out how many sounds there are.
2. Grapheme Connection:
- Use a dry-erase marker to write the letter(s) that match the sound under each magnet.
- You can also slide magnetic letter tiles under each magnet as you say the sounds.
- Touch each magnet and say the sound as you read the letters.
- Slide the magnets away and read the whole word.
Variations and Adaptations:
- You can use the big, magnetic whiteboard on your wall for this activity too!
- You might need to show the written word as the students write the letters to match the magnets.
- You can use magnetic letter tiles instead of writing the letters.
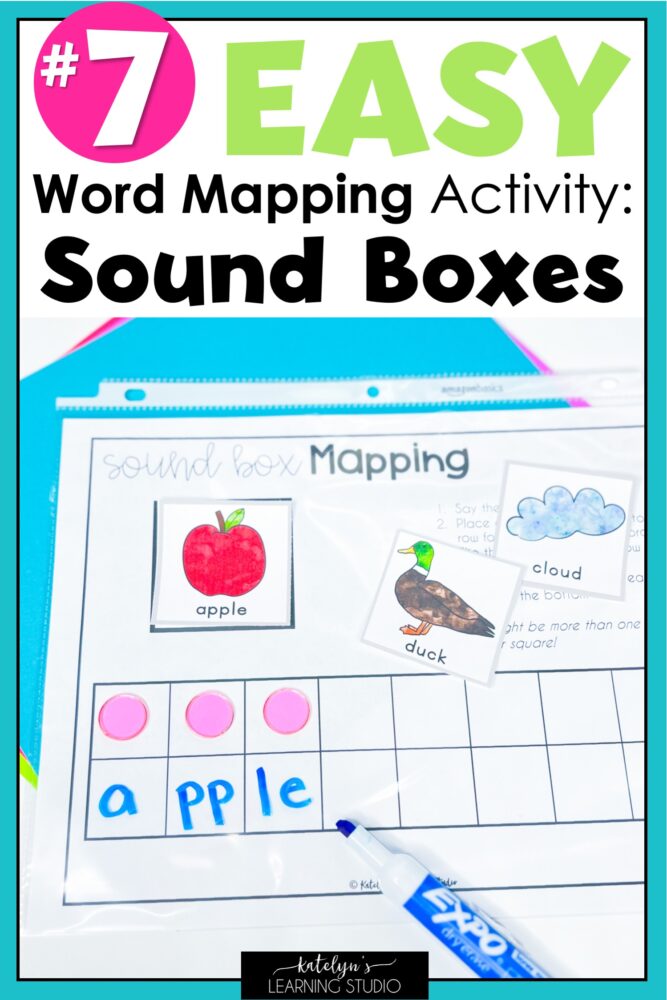
Sound boxes are a great tool for teaching word mapping.
Word Mapping Activity #7: Sound Boxes
Sounds boxes are one of the more traditional ways to practice word mapping, and are very simple and effective.
**Use a 2×10 grid in a page protector with a dry-erase marker
1. Phoneme Focus:
- Say a word.
- Say each sound out loud.
- Say each sound out loud again, but draw a dot in each box in the top row for each sound (each dot goes in a separate square).
2. Grapheme Connection:
- The teacher shows the word.
- The student writes the letter(s) that go with each sound in the box right below that sound dot.
- Students can then touch each dot as they read the letters beneath it.
Variations and Adaptations:
- Students might need help determining which letters go in each box.
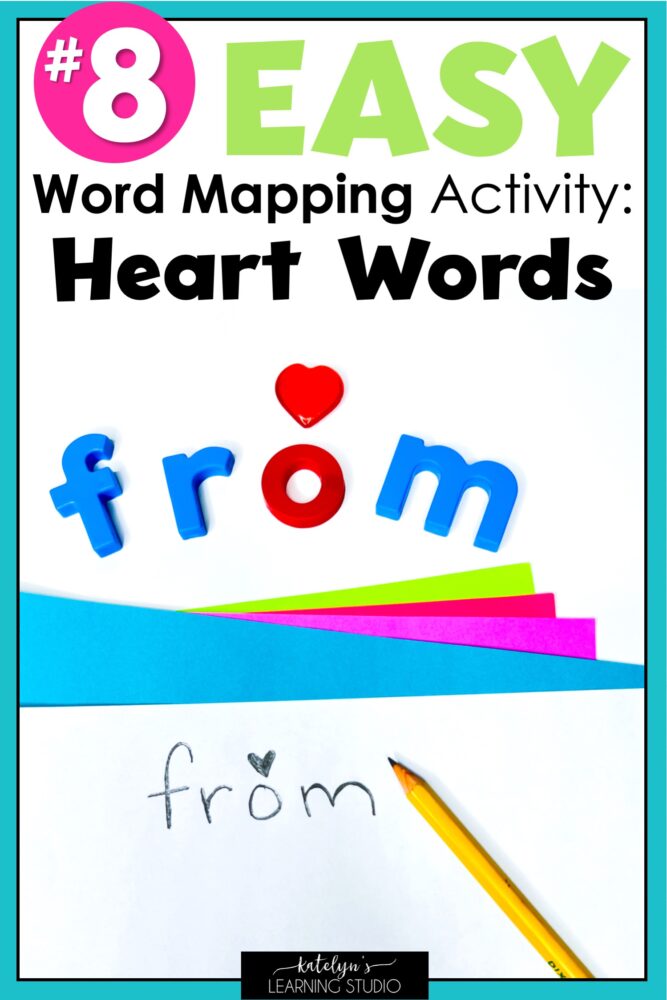
Word mapping makes it easier to learn heart words, or tricky sight words.
Word Mapping Activity #8: Heart Words
Some words may not follow the typical phonetic pattern. They might have a letter or letters that do not make the sound they normally make.
OR, students may not have learned that phonics pattern yet.
When mapping graphemes to phonemes, if there are any letters that make a different sound than expected, you can draw a little heart over those letters.
Then explicitly tell the student these letters do not make their normal sound. They make a different sound than we would expect, so instead of sounding them out, we just need to remember those letters by heart.
Intro:
- Show the written word and say each sound pointing to the letters.
- Find the letter(s) that make a different sound than usual.
1. Phoneme Focus:
- Identify the sound they think the letter(s) would normally make.
- Identify the sound they actually make in the word.
2. Grapheme Connection:
- Draw a heart over the tricky letter(s).
- Read each sound again, and point to the heart you drew when you say the “heart” sound.
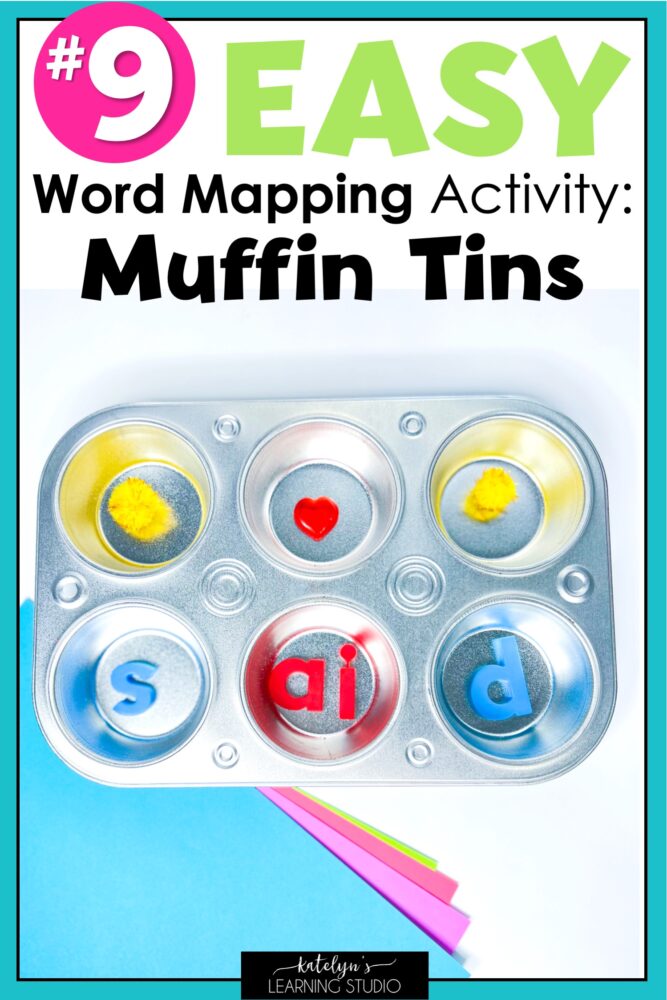
Phoneme grapheme mapping activities can use fun hands-on tools like in this muffin tin activity.
Word Mapping Activity #9: Muffin Tin Mapping
This is a great way to add variety and engagement to your word mapping activities! It works well for shorter words that only have 3 sounds–if you need more sounds, see the variation below!
You’ll need:
- a 2×3 half muffin pan (I found mine at Walmart)
- 3 pom poms
- letter tiles
- some little hearts if you want to practice heart words
1. Phoneme Focus:
- Say the word.
- Say each sound in the word as you drop one pom pom in each top muffin slot for each sound.
2. Grapheme Connection:
- Place the letter tiles that match each sound in the bottom muffin slot and say the sound as you put the letter tiles in.
- If there are any letters that do not make their expected sound (or a sound you haven’t learned yet), replace the pom pom above it with a heart.
Variations and Adaptations:
- For longer words, you can use a full muffin pan and just cover up the bottom row by taping a strip of paper over it.
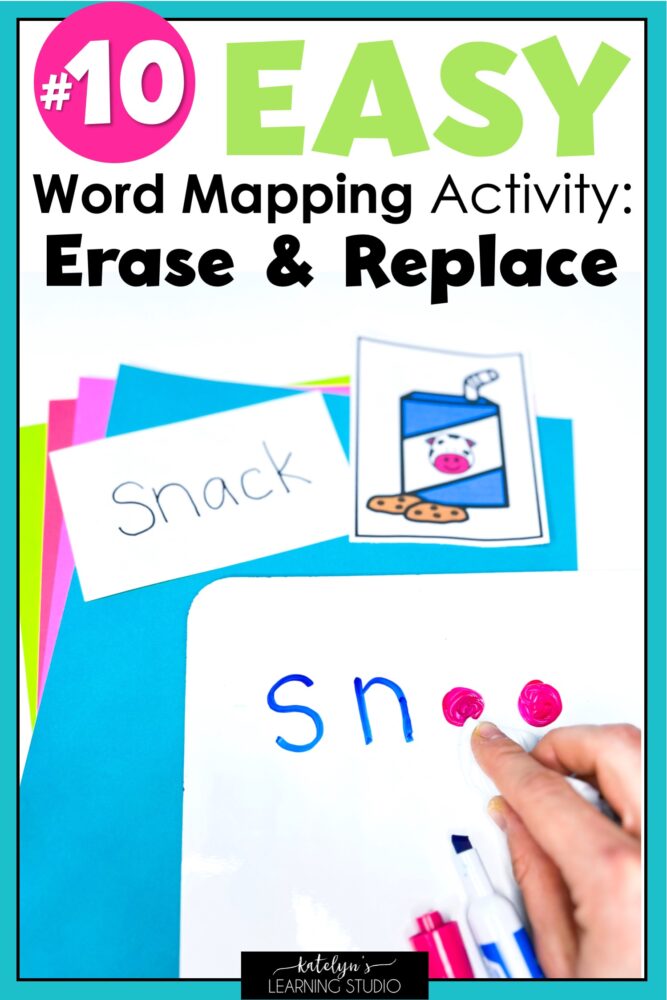
A great way to map graphemes to phonemes is to replace sound dots with letters.
Word Mapping Activity #10: White Board Erase & Replace
If you need a simple activity on the fly, this is a great no-prep option! It promotes phonemic awareness AND mapping graphemes to phonemes in such an efficient way.
1. Phoneme Focus:
- Say a word.
- Say each of the sounds out loud and draw a dot on a whiteboard for each sound.
2. Grapheme Connection:
- Say each sound again, but as you do, erase the dot and write the letter(s) that make that sound instead.
- Then read the whole word.
Variations and Adaptations:
- You can have the word already written out for students to look at as they write the letters.
- You can write the letters “grouped” into sounds for students to refer to if they need more support.
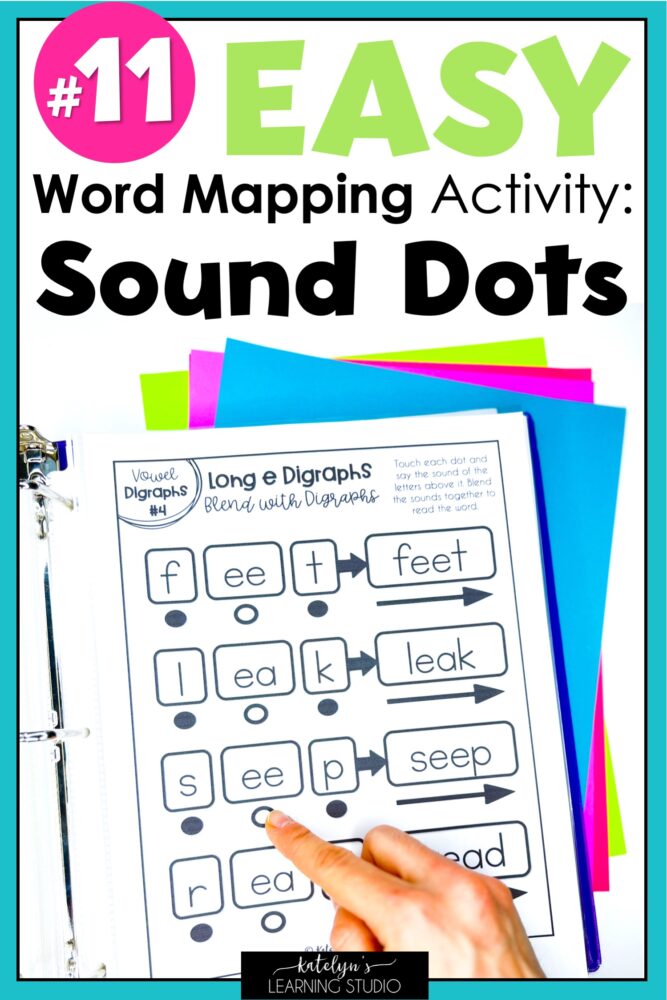
Make your word mapping lesson easy with ready-to-go sound dot activities in my Phonics Intervention Binder!
Word Mapping Activity #11: Sound Dot Reading
You can use this technique as you practice decoding your phonics words!
This is the perfect transition into word mapping WHILE you are reading. That is the ultimate end goal–to have students learn new words AS they read (as proposed in David Share’s Self-Teaching Hypothesis).
**Just a note, this self-teaching cannot happen unless the student already has a STRONG base in phonological awareness! I use my Phonological Awareness Intervention Binder to help build up their ability to work with phonemes first, and then work on word mapping activities like the sound dot reading in my Phonics Intervention Binder.
Phoneme Focus +Grapheme Connection:
- Show a written word, with a dot under each letter or group of letters that make one sound.
- There will be a dot for each sound, and it will line up with the letter(s) that make that sound.
- Have students touch each dot as they say the sound of the letter(s) above it.
- Then have them read the whole word.
Variations and Adaptations:
- For this transitional activity, the Phoneme Focus and Grapheme Connection happen simultaneously, but you can always say the word first, count the sounds, and then read the sound dots if students need more support.
You can write out your own words with sound dots, or I have TONS of sound dot activities for each phonics pattern in my Phonics Intervention Binder.
Word mapping is a HIGHLY effective tool in teaching reading intervention, as we know from research on the Science of Reading and the importance of phonemic awareness and orthographic mapping. These word mapping activities all promote essential orthographic mapping skills and help students learn new sight words in the most effective way. They make mapping graphemes to phonemes so much more tangible and transparent. Plus, they will have SO much fun doing all of the multi sensory activity elements!
